How to Choose a Tattoo Artist (Without Getting Burned)
Portfolio review, hygiene checks, consult red flags, deposits, and the questions that separate artists who'll do great work from artists who won't.
The artist matters more than the design, the shop matters more than the price, and the consult matters more than the Instagram following. If you get those three right, the rest of the process tends to fall into place. Here’s how to actually pick the right person to put a permanent thing on your body.
Step 1: Style match before anything else
Tattooing is not generalist work. An artist who does world-class American Traditional will rarely do world-class fine line, and vice versa. The single biggest mistake people make is picking an artist they like as a person and asking for a style they don’t specialize in.
Before you book anyone, identify the style you want. The big buckets:
- American Traditional / Neo-Traditional — bold lines, limited palette, designed to age
- Fine line / Single needle — delicate, often script or small illustration, ages faster
- Black and grey realism — photographic, smooth gradients, requires extensive shading skill
- Color realism — same as above plus pigment work, much harder
- Japanese / Irezumi — large-scale, traditional motifs, specific composition rules
- Blackwork / Geometric / Dotwork — high-contrast, pattern-based, no shading
- Illustrative / New School — cartoon-adjacent, often custom characters
- Watercolor / Painterly — softer pigment work, ages faster than most styles
Look at our style guides for what each style actually entails before you start shortlisting artists. An artist’s portfolio should be 80%+ work in your target style. If you’re looking at a fine-line artist’s grid and only 2 of every 10 pieces are fine line, they’re not your fine-line artist.
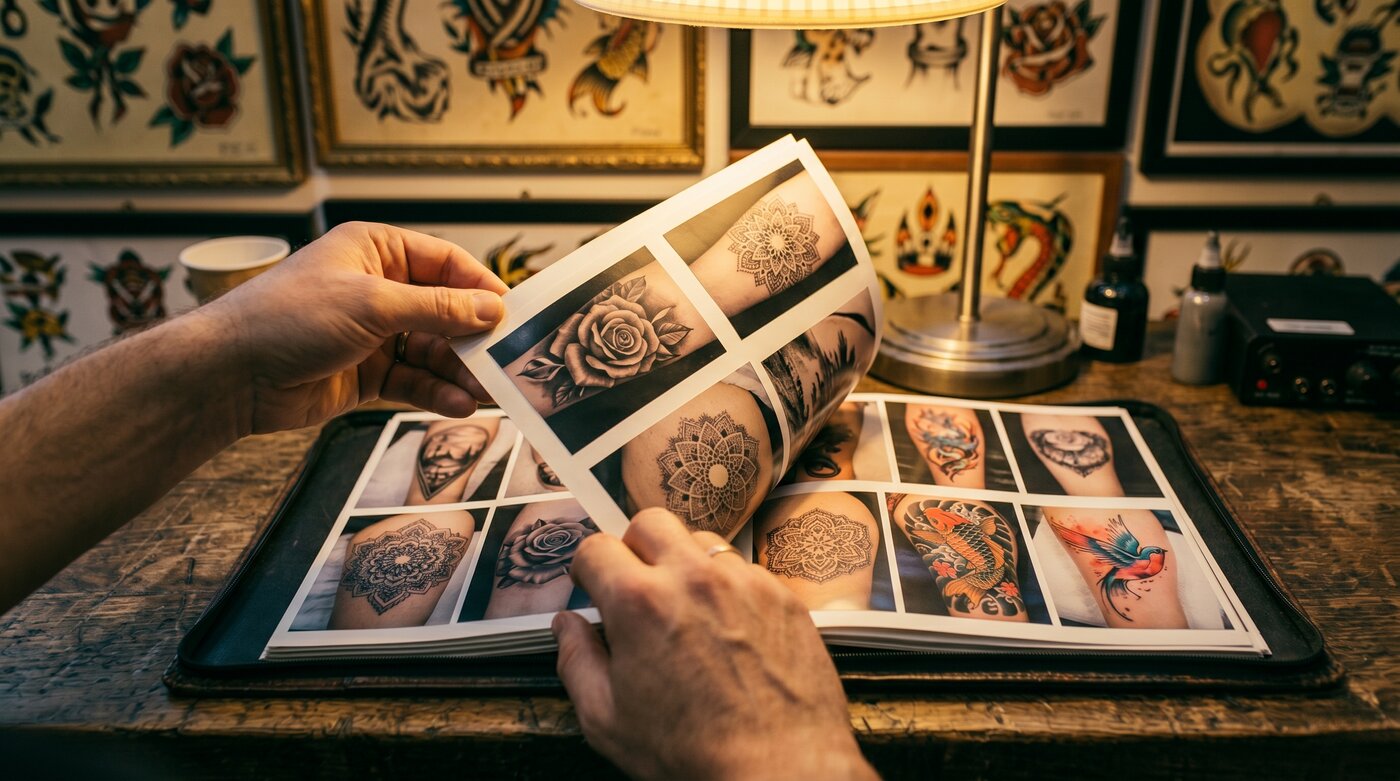
Step 2: Portfolio review (the real version)
Most people scroll an artist’s grid for two minutes and book. That’s how you end up disappointed. Here’s the slower version that works:
Look at healed work, not fresh. Fresh tattoos always look great — the contrast is artificially high because the skin is irritated and the ink is sitting at the surface. Real assessment happens at week 6+, when saturation has settled. Many good artists tag healed work explicitly. If they don’t, look at older posts in their grid; the ones where the surrounding skin looks normal are healed.
Check line consistency. In a single tattoo, do the lines stay the same weight from start to end, or do they thicken and thin? Inconsistency points to needle pressure issues that will get worse over time. This is most visible in linework-heavy styles (American Traditional, blackwork, fine line).
Look at how they handle large areas. Solid black should look uniform — no patchy spots, no banding. Color packing should be smooth without “gaps” between passes. If you see a tattoo that looks pixelated up close, that’s a saturation problem.
Examine the design choices, not the photos. A great artist’s portfolio is full of designs that are clearly theirs — composition, motif, layout. A weaker artist’s portfolio is full of pieces that look like they could have been done by anyone in that style. You want a voice.
Check older posts. Scroll back two to three years. Has the work improved, plateaued, or gotten worse? Improvement is the strongest signal. Plateau is fine if the floor is high. Decline (rare) is a warning.
Step 3: Hygiene and licensing — the boring stuff that matters
This is the part most people skip and then regret.
Licensing requirements vary by state. In most US states, both the artist and the shop need licenses, with bloodborne pathogen training renewed annually. Look up your state’s requirements — Texas, California, New York, and Florida all have searchable licensing databases. If your state has one and your artist isn’t in it, that’s not a paperwork issue, that’s a “they aren’t legally tattooing” issue.
Visit the shop in person if you can. Even a 5-minute drop-in tells you almost everything. Look for:
- Visibly clean stations (surfaces wiped between clients, not at the end of the day)
- Sealed needle packages opened in front of the client (single-use, never reused)
- Autoclave or ultrasonic cleaner in view (for sterilizing reusable instruments)
- Disposable barriers on machine grips, cords, lamps
- A sharps container by the station
- No food or drink on workstations
- A sign or paperwork visible for the most recent health inspection
Walk out if:
- The shop won’t show you their setup
- The artist opens needles from a non-sealed package in front of you
- There’s blood on surfaces or ink caps from a previous session
- They ask you to sign a release that waives liability for bloodborne pathogens specifically
A standard release covers the act of getting tattooed (you accept the medical risk, etc.). A release waiving bloodborne pathogen liability is a shop telling you up front they’re not confident in their hygiene. That’s a hard no.
Step 4: The consult
A consult is a 15–45 minute meeting (free at most shops, sometimes a small fee at higher-end ones credited to your final invoice) where you talk through the design, placement, sizing, and timeline. Skip the consult and you’re trusting the artist to read your mind on the day of.
Bring:
- Reference images for the style (other tattoos in the style you want, not photos of tattoos you want copied — copying is rude and most good artists won’t do it)
- The placement, with at least a rough idea of size in inches
- Your budget range, framed honestly
- Photos of the placement on your own body if it’s somewhere you can’t easily show in the chair (back, ribs, etc.)
Ask:
- “What size do you usually recommend for this design?” (their answer tells you whether they understand what holds up at scale)
- “How long do you think this will take?”
- “Do you want this in one session or split into two?”
- “What’s your hourly or flat rate for a piece this size?”
- “What’s your touch-up policy?” (covered in our touch-up guide)
- “Is the design custom or do you have flash that fits?”
- “What’s the deposit structure?”
Watch how they answer. A good artist will tell you what they think won’t work — sizing too small, placement issues, designs that won’t age. An artist who says “yes” to everything is either inexperienced or just trying to close the booking.
Step 5: Red flags at the consult
Walk away (politely) if:
- They push back on a consult and want to “just do it”
- They quote you a flat price without seeing the design or knowing the placement
- They show no work in your target style and say “I can do anything”
- They badmouth other artists, especially specific named ones
- They refuse to discuss touch-up policy or healing
- They ask for cash-only with no receipt
- They want full payment in advance (a deposit is fine; the full amount is not)
Less obvious but still bad:
- They argue with you about what design “would look better” without explaining why in technical terms (composition, line aging, etc.)
- They book you for a date more than 6 months out without taking a deposit (they’re holding the slot loosely)
- They’ve changed shops three or more times in two years (sometimes legitimate; often a sign of conflict)
Step 6: Pricing and deposits
A standard deposit is $50–$200 for small to medium pieces, 25–50% of total for large or full-day work. Deposits are typically:
- Non-refundable if you cancel
- Credited toward your final invoice
- Forfeit if you no-show or reschedule fewer than 48 hours out
This is industry-standard. Anyone trying to charge a 100% upfront fee on a regular tattoo is either inexperienced or running you. Anyone with no deposit at all is probably going to deprioritize your booking.
For real numbers on what custom work costs, see our pricing guide. The headline: don’t pick the cheapest quote.
Step 7: Finding artists in your city
The algorithm is the same regardless of where you are: identify the style, then search Instagram or Google for “[style] tattoo artist [city]” — fine line tattoo artist Chicago, Japanese tattoo artist Austin, etc. Pull 8–10 candidates, then run each through the portfolio checklist above.
Instagram hashtags by style also surface local work reliably: #[city]tattoo, #[city]tattooartist, #[style]tattoo. Filter by location and recency.
If an artist you want is in another city and they occasionally do guest spots, watch their Stories — most artists announce tour stops 2–6 weeks out. Getting tattooed by a touring artist at a local shop is a common way to access skill levels that don’t exist in smaller markets.
Step 8: After you book
Most reputable shops send a digital paperwork packet ahead of the appointment. Common things to confirm:
- Aftercare protocol (some shops are second-skin-only, some are wash-and-balm — read our aftercare guide and have supplies ready before the appointment: fragrance-free soap and a quality balm at minimum)
- Cancellation/reschedule policy
- Medication and skin-condition disclosures (lidocaine creams, retinoids, isotretinoin, eczema medications, blood thinners — be honest about all of these)
- Day-of arrival instructions (eat, hydrate, no alcohol the night before)
For first-timers, also see our first tattoo checklist for what to do the morning of.
The short version
- Pick the style, then find artists who specialize in it
- Review healed work, not fresh; check line consistency and saturation
- Verify the shop and artist are licensed; visit in person if possible
- Book a consult; ask the listed questions; pay attention to what they push back on
- Walk away from any of the red flags
- Pay a normal deposit; don’t pay full upfront
- For your city, start with our directory; otherwise apply the checklist yourself
The artist you want is one who tells you what they won’t do, not one who’ll do anything. Pick that one.
Tattoo Balm
Affiliate link · We earn a commission at no extra cost to you
Check price on Amazon →
Pure-Castile Liquid Soap (Unscented)
Affiliate link · We earn a commission at no extra cost to you
Check price on Amazon →